What Is Aperture
Aperture, in the context of photography, is a term that refers to the size of the opening in a camera lens. It is measured in terms of f-number, which is the ratio of the focal length to the aperture diameter. The f-number is denoted by an “f” before a number. For example, an f/1.4 aperture means that the aperture diameter is 1.4 times the focal length of the lens.
Understanding Aperture in Photography
The aperture of a camera lens controls the amount of light that enters the camera. A larger aperture number means a larger opening, allowing more light to enter the camera and creating a shallower depth of field. Conversely, a smaller aperture number means a smaller opening, allowing less light to enter the camera and creating a deeper depth of field.
Effect of Aperture on Image Quality
The aperture also affects the quality of the image. A larger aperture can create a shallower depth of field, which can be useful in certain situations, such as when you want to blur the background to focus on the subject. However, a larger aperture also requires more light, which can be a problem in low-light situations.
On the other hand, a smaller aperture can create a deeper depth of field, which can be useful in situations where you want to keep the subject and the background in focus. However, a smaller aperture also allows less light to enter the camera, which can result in a darker image.
Vignetting and Diffraction
The use of aperture can also lead to vignetting and diffraction. Vignetting is a darkening of the edges of the image that occurs when the aperture is fully open. Diffraction, on the other hand, is a distortion of the image that occurs when the aperture is fully open.
Choosing the Right Aperture
Choosing the right aperture depends on the specific needs of the photographer and the situation. For example, a photographer who is shooting in low light might prefer to use a smaller aperture to allow more light to enter the camera. On the other hand, a photographer who wants to create a shallow depth of field might prefer to use a larger aperture.
Aperture in Photography Tips
When setting the aperture on a camera, it’s important to consider the effect on the image. A larger aperture will create a shallower depth of field and can lead to vignetting and diffraction. A smaller aperture will create a deeper depth of field but will also allow less light to enter the camera.
When choosing the right aperture, consider the lighting conditions and the desired depth of field. For example, in low light, a smaller aperture might be necessary to allow more light to enter the camera. On the other hand, in bright light, a larger aperture might be appropriate to create a shallow depth of field.
Remember, the aperture is just one of many factors that can affect the quality of a photograph. Other factors, such as the shutter speed and the ISO, also play a significant role.
In conclusion, aperture is a crucial aspect of photography that can greatly affect the quality of the final image. By understanding how aperture works and how to use it effectively, photographers can create stunning images that capture the beauty of the world around them.
What Is Aperture in Videography and Filmmaking?
Aperture in videography and filmmaking refers to the size of the opening in a camera lens. It is measured in terms of f-number, which is the ratio of the focal length to the aperture diameter. The f-number is denoted by an “f” before a number. For example, an f/1.4 aperture means that the aperture diameter is 1.4 times the focal length of the lens.
Understanding Aperture in Videography and Filmmaking.
The aperture of a camera lens controls the amount of light that enters the camera. A larger aperture number means a larger opening, allowing more light to enter the camera and creating a shallower depth of field. Conversely, a smaller aperture number means a smaller opening, allowing less light to enter the camera and creating a deeper depth of field.
Effect of Aperture on Video Quality
The aperture also affects the quality of the video. A larger aperture can create a shallower depth of field, which can be useful in certain situations, such as when you want to blur the background to focus on the subject. However, a larger aperture also requires more light, which can be a problem in low-light situations.
On the other hand, a smaller aperture can create a deeper depth of field, which can be useful in situations where you want to keep the subject and the background in focus. However, a smaller aperture also allows less light to enter the camera, which can result in a darker video.
Choosing the Right Aperture
Choosing the right aperture depends on the specific needs of the videographer and the situation. For example, a videographer who is shooting in low light might prefer to use a smaller aperture to allow more light to enter the camera. On the other hand, a videographer who wants to create a shallow depth of field might prefer to use a larger aperture.
Aperture in Videography and Filmmaking Tips
When setting the aperture on a camera, it’s important to consider the effect on the video. A larger aperture will create a shallower depth of field and can lead to less light reaching the sensor. A smaller aperture will create a deeper depth of field but will also allow less light to enter the camera.
When choosing the right aperture, consider the lighting conditions and the desired depth of field. For example, in low light, a smaller aperture might be necessary to allow more light to enter the camera. On the other hand, in bright light, a larger aperture might be appropriate to create a shallow depth of field.
Remember, the aperture is just one of many factors that can affect the quality of a video. Other factors, such as the shutter speed and the ISO, also play a significant role.
In conclusion, aperture is a crucial aspect of videography and filmmaking that can greatly affect the quality of the final video. By understanding how aperture works and how to use it effectively, videographers and filmmakers can create stunning videos that capture the beauty of the world around them.
How Does Aperture Affect the Depth of Field?
Aperture in photography and filmmaking refers to the size of the opening in a camera lens. It is measured in terms of f-number, which is the ratio of the focal length to the aperture diameter. The aperture controls the amount of light that enters the camera, and it plays a significant role in determining the depth of field in a photograph or video.
Understanding Depth of Field
The depth of field refers to the range of distance in a photograph or video that appears sharp and in focus. It is the interplay between your subject or focal point and the surrounding elements that adds a sense of dimension, depth, and realism to your images. You can either choose to isolate your subject and add a dreamy blur effect, or capture a sweeping landscape in crisp detail.
How Aperture Affects Depth of Field
The relationship between aperture and depth of field can be likened to a delicate dance, where subtle adjustments yield impactful effects in your images. As mentioned earlier, aperture, which is the opening in your camera lens that controls the amount of light entering the camera, plays a crucial role in shaping the depth of field.
It’s important to know that aperture and depth of field have an inverse relationship — meaning that the wider the aperture (a smaller f-stop value like f/1.8) then the more shallow the depth of field, and the more narrow the aperture (larger f-stop value like f/16) then the more narrow the depth of field.
In other words, a larger aperture number means a larger opening, allowing more light to enter the camera and creating a shallower depth of field. Conversely, a smaller aperture number means a smaller opening, allowing less light to enter the camera and creating a deeper depth of field.
Shallow Depth of Field
A shallow depth of field refers to an image that has only a small part of it acceptably sharp and the rest out of focus. In other words, the in-focus area of the image is very narrow. A shallow depth of field will make your subject stand out from the background. Here are a few situations when a shallow DoF often makes sense:
- In portrait photography when you want to emphasize your subject’s features
- In wildlife photography when you want the animal to stand out
- In sports photography when you want to bring attention to the athlete
- In macro photography when you want to focus the viewer on a flower, plant, or insect
- In event and street photography when you want to isolate an individual in a chaotic environment
Deep Depth of Field
On the other hand, a deep depth of field refers to an image where a large portion of the image is acceptably sharp and in focus. This is achieved by using a smaller aperture, which allows less light to enter the camera but creates a deeper depth of field.
How to Choose the Correct Aperture Setting for Your Camera
Aperture, one of the three primary camera settings alongside shutter speed and ISO, plays a crucial role in capturing the perfect shot. Whether you’re a photographer or a videographer, mastering the art of choosing the right aperture is essential for creating stunning visuals.
Understanding Aperture
Aperture refers to the size of the opening in a camera lens. It is measured in terms of f-number, which is the ratio of the focal length to the aperture diameter. The aperture controls the amount of light that enters the camera, and it plays a significant role in determining the depth of field in a photograph or video.
Factors to Consider When Choosing Aperture
There are several factors to consider when choosing the correct aperture setting for your camera:
Lighting Conditions
The lighting conditions can significantly influence the correct aperture setting. If you’re shooting in low light, you might need to use a smaller aperture to allow more light to enter the camera. On the other hand, if you’re shooting in bright light, you might prefer to use a larger aperture to create a shallow depth of field.
Desired Depth of Field
The depth of field refers to the range of distance in a photograph or video that appears sharp and in focus. If you want to create a shallow depth of field, you should use a larger aperture. Conversely, if you want to create a deep depth of field, you should use a smaller aperture.
Subject and Background
The subject and the background in your photograph or video can also influence the correct aperture setting. If you want to keep the subject and the background in focus, you should use a smaller aperture. On the other hand, if you want to blur the background to focus on the subject, you should use a larger aperture.
How to Adjust the Aperture on Your Camera
Adjusting the aperture on your camera is easy. You just set your camera’s shooting mode to Manual or Aperture Priority. Then rotate the relevant camera dial to change the f-number. The specific dial will depend on your camera model; if you’re struggling, consult your manual.
When to Use a Larger Aperture
Aperture, in photography and videography, is the size of the opening in a camera lens that controls the amount of light entering the camera. The aperture is measured in terms of f-number, which is the ratio of the focal length to the aperture diameter. The aperture also plays a significant role in determining the depth of field in a photograph or video.
In certain situations, using a larger aperture can yield the best results. Here are a few examples:
1. Product Photography
Product photographers often use a wide aperture to create a background blur that emphasizes the subject and creates a more artistic vibe. This is common when capturing products outdoors or in a more informal setting.
For example, if you’re shooting a product like a piece of jewelry, you might use a larger aperture to blur the background and make the jewelry stand out. This not only highlights the product but also gives the image a more artistic and appealing look.
2. Low-Light Situations
In low-light situations, you might need to use a larger aperture to allow more light to enter the camera. This is because a larger aperture opens up the camera lens, allowing more light to reach the sensor. This is particularly useful in situations where you don’t have the option to increase the ISO or use a tripod to increase the shutter speed.
3. Portrait Photography
In portrait photography, a larger aperture can be used to create a shallow depth of field, which can make the subject stand out against the blurred background. This can be particularly useful when you want to draw the viewer’s attention to the subject.
4. Event Photography
In event photography, a larger aperture can be used to ensure that the subject and the background are both in focus. This can be useful in situations where the subject is moving or the background is distracting.
Remember, the choice of aperture setting depends on the specific needs of the photographer and the situation. It’s always a good idea to experiment with different settings and adjust the aperture based on what works best for your specific situation.
Types of Aperture
Fixed Aperture vs Variable Aperture Lenses
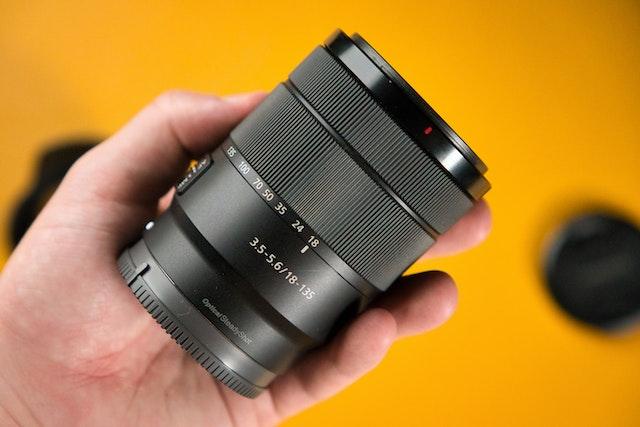
One of the main differences between lenses is whether they have a fixed or variable aperture. Fixed aperture lenses have a consistent maximum aperture throughout their zoom range, while variable aperture lenses have a maximum aperture that changes when the lens is zoomed in or out.
For example, a 70-200mm f/4 lens has a fixed maximum aperture of f/4 at all focal lengths, while a 70-300mm f/4-5.6 lens will have an f/4 maximum aperture at 70mm but only an f/5.6 maximum aperture at 300mm.
Fixed aperture lenses are typically more expensive and higher quality than variable aperture lenses because they require more complex design and construction to maintain the same level of performance across their entire zoom range.
Variable-aperture lenses are more affordable, lighter in weight, and easier to manufacture. You might consider reading more of the articles we wrote like: Focal Length: A Comprehensive Guide.
Manual vs Automatic Aperture Control
In photography, there are two ways to control the size of your camera’s aperture: manual control and automatic control. Manual control allows you to set the desired size of your camera’s aperture using the lens’ physical ring – usually labeled with “f/” numbers – whereas automatic control relies on the camera’s internal metering system to determine the appropriate setting for you.
Manual control offers greater flexibility and creative expression because it allows you to adjust your exposure settings according to your artistic vision rather than relying on an automated system that may not always make optimal decisions.
However, it requires more experience and knowledge about how apertures work together with shutter speed and ISO to achieve proper exposure. Automatic mode is suitable for beginners or photographers who need to capture photos quickly without having time for adjusting settings manually – such as photojournalists or event photographers.
Commonly used apertures (f/1, f/1.4, f/2, f/2.8, f/4, f/5.6)
The physical size of an aperture is expressed in terms of its “f/” number – a ratio of the focal length divided by the diameter of the opening. The smaller the “f/” number, the larger the aperture and the narrower the depth of field.
Commonly used apertures include:
- f/1 and f/1.4 – These are considered very large apertures with a very narrow depth of field suitable for portraits or artistic shots.
- f/2 and f/2.8 – These are also large but not as extreme as F 1 and F 1.4 and suitable for portraits or close-ups to create a nice blurred background.
- f/4 – A mid-range aperture ideal for many types of photography including landscapes, street photography.
- f/5.6 – A fairly small aperture suitable for capturing more depth of field in landscapes or group shots where you want more subjects in focus.
Choosing your aperture is important because it will affect how much light enters your camera’s sensor and how much depth-of-field you have to work with among other things like sharpness and lens imperfections based on lens design.
How does Aperture affect your photos?
Depth of Field (DOF) and Bokeh effect
When taking a photograph, one of the most important things to consider is the depth of field, which determines how much of the image will be in focus. Aperture plays a significant role in controlling the depth of field, and by extension, the bokeh effect.
The bokeh effect refers to the aesthetic quality of blur produced in out-of-focus areas of an image. Shallow DOF is commonly used for portraits to create a blurred background, making the subject stand out.
This is especially useful when taking headshots or close-up shots as it draws attention to the subject’s features. To achieve this effect, a large aperture (small f-number) should be used.
On the other hand, wide DOF is used primarily for landscape photography where you want as much detail as possible in both foreground and background. To achieve this wide DOF, a small aperture (large f-number) should be used.
The bokeh effect can add an artistic touch to portraits and other types of photography by creating a soft and dreamy background that isolates your subject from its surroundings. It can be achieved by using a large aperture that creates shallow depth-of-field and blurs out-of-focus highlights into smooth circles.
Exposure and Light Control
Aperture also affects exposure by controlling how much light enters through your camera’s lens. The larger your aperture opening (smaller f-number), the more light will enter your camera, resulting in overexposed images if you don’t compensate with shorter shutter speeds or lower ISO settings.
Conversely, smaller apertures (larger f-numbers) reduce light entering through your camera’s lens resulting in underexposed images if not compensated for with longer shutter speeds or higher ISO settings. It’s crucial to find the right balance between aperture, shutter speed, and ISO for your scene to avoid over or underexposure.
Understanding how to control and adjust your aperture can help you take perfect shots without having to rely on editing software. Mastering Aperture is essential for taking professional-grade photographs.
The depth of field and bokeh effect play a significant role in controlling the aesthetic quality of a shot, while exposure and light control are critical in producing well-lit images. By experimenting with different aperture settings in different scenarios, photographers can learn how to take beautiful photos that showcase their creativity and skill.
Aperture Priority Mode: What Is It?
Aperture priority mode, also known as A or Av mode, is a semi-automatic shooting mode on a camera where the photographer sets the desired aperture value and the camera selects the appropriate shutter speed to get a correct exposure.
This shooting mode is ideal for photographers who want more control over their depth of field without worrying about shutter speed and ISO settings. Aperture priority is a helpful tool in situations where there’s minimal movement or when you want to create images with shallow depth-of-field in portraits or macro photography.
One benefit of using aperture priority mode is that it allows you to take advantage of your lens’s maximum aperture capability, which can open up creative possibilities for your photos. For example, if you’re using a fast lens with an aperture of f/1.4, setting your camera to aperture priority will allow you to shoot at that wide-open aperture while letting the camera determine the optimal shutter speed for proper exposure.
Similarly, by adjusting your lens’s aperture higher to f/8 or f/11 in bright light conditions, it can help produce sharper images while still allowing adequate light into the sensor.
How To Use It?
Using Aperture Priority Mode on your camera is simple and straightforward; follow these steps: 1. Switch your camera to A (Nikon) or Av (Canon) mode. 2. Dial in your desired f-stop by rotating the command dial.
3. Check if ISO settings are on Auto or not. 4. Frame and focus on your subject.
5. Hold down halfway on the shutter button; then look at the shutter speed value indicated in your viewfinder or LCD screen—this represents how long the sensor is exposed to light. 6. Adjust ISO settings manually if needed until you get a proper exposure reading.
When selecting an aperture value, consider the type of photograph you want to capture. For example, if you are shooting a portrait, set a wide aperture (small f-number) such as f/1.8 or f/2.8 to create a shallow depth-of-field that blurs out the background and brings your subject into sharp focus.
On the other hand, for landscapes, use a narrow aperture (large f-number) like f/11 or higher to have more detail throughout the image from foreground to background. Keep in mind that in Aperture Priority mode, you still need to monitor your shutter speed and adjust accordingly if it is too slow or too fast for the desired effect.
In low light situations, you may need to adjust ISO manually or switch to both aperture and shutter priority modes for better control over exposure settings. Overall, Aperture Priority Mode is an essential tool that helps photographers achieve their creative visions with ease while also providing complete control over depth-of-field in their photographs.
Aperture and L
The Connection between Aperture and Lens Quality
When considering aperture, it’s important to consider the quality of the lens as well. The higher quality a lens is, the better it will perform when used at its widest aperture.
This is because high-quality lenses are designed to minimize flaws such as chromatic aberration, distortion, and vignetting. With a lower quality lens, using it at its widest aperture can result in noticeable flaws in your images.
However, with a high-quality lens, you can achieve beautiful results even when shooting wide open. It’s important to invest in good lenses if you want to make the most out of your camera’s capabilities.
The Trade-Off between Aperture and Cost
While investing in a high-quality lens is crucial for achieving great results with wide apertures, it’s worth noting that these lenses come at a steep cost compared to their lower-grade counterparts. For instance, an f/1.4 or f/1.8 prime lens can cost upwards of $1,000 while a standard kit zoom lens may only be $200-$300.
It’s essential for photographers to weigh the benefits of wider apertures against their budget constraints before investing in equipment that they may not be able to use optimally or frequently enough due to price.
What is aperture and how does it affect photography?
Aperture is the opening in a camera lens that allows light to pass through. It is an important factor in photography as it affects the depth of field, exposure, and amount of light in a photograph.
A larger aperture will result in a shallower depth of field, a shorter exposure time, and more light, while a smaller aperture will result in a deeper depth of field, a longer exposure time, and less light.
How does aperture affect depth of field in a photograph?
Aperture affects depth of field in a photograph by determining the amount of the scene that will be in focus. A larger aperture will result in a shallower depth of field, while a smaller aperture will result in a deeper depth of field.
What is the relationship between aperture and shutter speed?
The relationship between aperture and shutter speed is that a larger aperture will require a shorter shutter speed, while a smaller aperture will require a longer shutter speed. This is because a larger aperture will allow more light to pass through, which will require a shorter exposure time.
How can you use aperture to create a shallow depth of field?
You can use aperture to create a shallow depth of field by using a larger aperture. A larger aperture will result in a shallower depth of field, while a smaller aperture will result in a deeper depth of field. By using a larger aperture, the photographer can create a shallow depth of field and isolate the subject from the background.
What is the difference between a wide aperture and a narrow aperture?
The difference between a wide aperture and a narrow aperture is that a wide aperture will result in a shallower depth of field, a shorter exposure time, and more light, while a narrow aperture will result in a deeper depth of field, a longer exposure time, and less light.
How does aperture affect the exposure of a photograph?
Aperture affects the exposure of a photograph by determining the amount of light that will be allowed to pass through the lens. A larger aperture will result in a shorter exposure time, while a smaller aperture will result in a longer exposure time.
What is the ideal aperture for landscape photography?
The ideal aperture for landscape photography is between f/8 and f/11. This aperture will result in a deep depth of field that will keep the entire scene in focus.
How can you use aperture to create a sense of motion in your photographs?
You can use aperture to create a sense of motion in your photographs by using a larger aperture. A larger aperture will result in a shorter exposure time, which will capture motion blur and create a sense of movement in the photograph.
What is the effect of changing the aperture on the bokeh in a photograph?
Changing the aperture will affect the bokeh in a photograph by determining the amount of the scene that will be in focus. A larger aperture will result in a shallower depth of field, which will create a softer and more pleasing bokeh.
How can you use aperture to control the amount of light in a photograph?
You can use aperture to control the amount of light in a photograph by carefully choosing the aperture of the lens. A larger aperture will allow more light to pass through, while a smaller aperture will allow less light to pass through. By adjusting the aperture, the photographer can control the amount of light in the photograph.
Conclusion
Aperture is one of the most fundamental concepts for photographers looking to improve their skills behind the camera. It allows for creative control over depth-of-field and exposure while also playing an integral role in image composition and storytelling.
Therefore,it’s vital to understand how aperture works within your camera system so that you can use it effectively in all shooting situations. As you practice photographing with different apertures and lenses combinations,you’ll start to see how they affect each other.You’ll know which aperture to choose for the look you want, and you’ll be able to work within the limits of your budget while purchasing lenses.
While investing in high-quality equipment can be expensive, it will ultimately pay off in creating images that stand out from the rest. The journey towards mastering aperture is a continuous process, but with dedication and practice, you’ll soon find yourself creating breathtaking images that capture the essence of what makes photography such a beautiful art form.

I am a highly experienced film and media person who has a great deal to offer to like-minded individuals. Currently working on several exciting projects, I am a film and media practitioner for over a decade. I have achieved a great deal of success in my professional career.