You’ve poured your creativity, time, and passion into every frame of your film. The story is compelling, the visuals are stunning, and the sound design is immersive. You’re ready to share it with the world, specifically with the discerning eyes of film festival programmers. But then you hit the final hurdle: “Export settings,” “codec requirements,” “ProRes,” “DCP,” “H.264“… suddenly, your artistic masterpiece meets a wall of technical jargon.
Feeling a knot of anxiety tighten in your stomach? You’re not alone. For many filmmakers, the world of video codecs, containers, and export specifications feels like a foreign language.
One wrong setting, one overlooked detail, and your beautifully crafted film could end up looking pixelated, sounding muffled, or simply being rejected by a festival due to technical non-compliance.
Imagine this, though: You confidently navigate the export menu, knowing exactly which codec to choose for a pristine festival screener, and understanding what to prepare for a dazzling theatrical exhibition. You hit ‘export’ with the assurance that your film will be seen exactly as you intended, preserving every detail you painstakingly created.
This guide is designed to transform that anxiety into assurance. We’ll demystify the essential export codecs and formats required by film festivals worldwide.
We’ll break down the technicalities into clear, understandable steps, equipping you with the knowledge to make informed decisions and ensure your film makes a flawless, impactful impression, from the smallest screener to the largest cinema screen.
Ready to conquer the final technical frontier of your film’s journey? Let’s decode the world of festival export.
2. Understanding the Basics: What are Codecs and Containers?
Before we dive into specific export settings, it’s crucial to grasp the two core components that make up virtually every digital video file you’ll encounter: the Codec and the Container. These terms are often used interchangeably, but they serve very distinct purposes. Think of it like this:
A. The Codec: The “Language” and “Compression Method”
The word “Codec” is a portmanteau of Coder/Decoder (or sometimes, Compressor/Decompressor).
- What it does: A codec is essentially a set of instructions, an algorithm, that dictates how your video (and often audio) data is compressed and decompressed.
- Compression (Encoding): When you export your video, the codec takes your raw, massive video footage and shrinks its file size. It does this by intelligently removing redundant information (e.g., areas of static color, or parts of a scene that don’t change between frames) or by discarding data that the human eye is less likely to perceive. This process is called “encoding.”
- Decompression (Decoding): When someone plays your video, the codec reverses this process, expanding the compressed data back into viewable video frames. This is “decoding.”
- Why it’s necessary: Uncompressed video files are enormous. Just one minute of uncompressed Full HD video can easily be several gigabytes! Codecs make these files manageable for storage, transfer over the internet, and smooth playback on various devices.
- Lossy vs. Lossless:
- Lossy Codecs: These are the most common for delivery (like sending to festivals or online streaming). They achieve significant file size reduction by permanently discarding some data. The goal is to lose the least perceptible data, making the file much smaller while maintaining visually acceptable quality. (e.g., H.264, H.265).
- Lossless Codecs: These compress data without losing any information. They result in much larger files but are used when absolute fidelity is paramount, often for archiving master copies or certain stages of professional editing. (e.g., some specialized ProRes settings).
- Key takeaway for filmmakers: The codec you choose directly impacts your file size, visual quality, and how efficiently your video can be played back.
B. The Container: The “Box” or “Wrapper”
The container (often called a “wrapper” or “file format”) is like a digital envelope or a box that holds all the different elements of your video file together.
- What it does: A container format stores the compressed video stream (encoded by the codec), the audio stream (often encoded by its own audio codec like AAC or MP3), subtitles, metadata (like title, director, creation date), and ensures they are synchronized for seamless playback.
- Common Examples: The familiar file extensions you see, like
.mp4,.mov,.mkv, and.avi, denote the container format. - Why it’s necessary: Without a container, you’d have separate video files, audio files, and subtitle files, making it impossible to play them together as a single, cohesive film. The container provides the structure for all these elements.
- Analogy:
- Imagine a book. The text inside is compressed using a “language” (your codec). The binding of the book (its cover, pages, and how it’s organized) is the container.
- You can have the same language (codec) written in different bindings (containers – a paperback vs. a hardcover).
- Conversely, a hardcover book (container) can hold text written in different languages (codecs).
- Key takeaway for filmmakers: While the codec determines the quality and size of the content, the container dictates how that content is packaged and organized, affecting its compatibility with different players and systems. A festival might request a specific codec within a specific container (e.g., “H.264 video in an .mp4 container”).
Understanding this fundamental distinction between the “how it’s compressed” (codec) and the “what holds it” (container) is your first step to confidently navigating the world of video exports for film festivals.
3. The “Why” Behind Specific Codec Choices for Festivals: They Have Their Reasons!
It might feel like festivals are just making arbitrary technical demands to complicate your life. In reality, their specific codec and format requirements are born out of very practical necessities for both their screening committees and their exhibition teams. Understanding why they ask for what they do will help you appreciate the importance of adhering to their specifications.
Here are the key reasons why festivals are so particular about your export codecs:
A. Efficient and Fair Evaluation (For Screeners):
- Massive Volume: Film festivals, especially the larger, more prestigious ones, receive thousands upon thousands of submissions. Imagine a team of screeners having to review over 5,000 films. If every film arrives in a different, obscure, or poorly compressed format, it becomes a logistical nightmare.
- Playback Compatibility: Festivals need a consistent, reliable way to play every submitted film across their various screening setups (laptops, dedicated screening rooms). Common codecs like H.264 in an MP4 container are universally supported, minimizing technical glitches during the crucial review process. An unplayable file means your film won’t even be considered.
- Consistent Quality: While screeners don’t need to be pristine, they need to be clear and free of distracting compression artifacts. Festivals want to ensure that they are judging your film fairly, based on your creative intent, not because a poor export makes it look pixelated or sound garbled.
- Bandwidth & Storage: For online submissions, smaller, efficiently compressed files (like well-encoded H.264) reduce upload times for filmmakers and storage/streaming costs for the festivals.
B. Pristine Theatrical Exhibition (For Accepted Films):
- The Big Screen Demands Quality: What looks “good enough” on a laptop screen will often fall apart on a large cinema projector. Festivals are dedicated to showcasing films at their best. They require codecs that retain maximum image and sound quality, ensuring your film looks sharp, detailed, and vibrant, and sounds clear and impactful in a professional theatrical environment.
- Professional Playback Systems: Cinemas use specialized projection systems (often Digital Cinema Projectors, or DCP servers) that are designed to play specific, uncompromised file types. They aren’t running consumer media players. Formats like DCP, ProRes, or DNxHD are industry standards because they provide the necessary quality and compatibility for these high-end systems.
- Minimizing Transcoding Errors: If you send a poorly compressed file or one in an uncommon format, the festival’s technical team will have to re-encode (transcode) it to their preferred exhibition format. Every time a file is transcoded, there’s a risk of introducing new compression artifacts or errors, potentially degrading your film’s quality. By providing the correct high-quality file from the outset, you prevent this “double compression” and ensure your original vision is maintained.
- Standardization for Efficiency: Just like with screeners, if a festival has to manage 100 accepted films in 50 different formats, their technical team would be overwhelmed. Standardized, high-quality formats allow them to streamline their workflow for ingesting, quality checking, and projecting films.
C. Archiving and Future Use:
- Preservation: Many festivals, especially those with a legacy or a public archive, want to preserve selected films in high-quality formats for future screenings, retrospectives, or educational purposes. Robust, widely supported codecs ensure the longevity and accessibility of your film.
- Distribution / Market Needs: Some festivals host film markets where distributors and sales agents are looking for content. Having your film in industry-standard, high-quality formats (like ProRes or DCP) makes it easier for these professionals to acquire and distribute your film further.
D. Avoiding Technical Nightmares and Delays:
- Saving Time and Resources: Festivals run on tight schedules, especially during the event itself. Technical issues with projection or playback caused by incorrect codecs are a nightmare. They lead to delays, frustrated audiences, and immense stress for the festival staff. Your properly formatted file saves them time, effort, and keeps the program running smoothly.
- Your Film’s Reputation: If your film causes technical problems, it reflects poorly not just on you, but potentially on the festival’s technical prowess. They want a seamless experience for their attendees.
In essence, festivals aren’t trying to be difficult. They’re trying to ensure your film gets the best possible presentation to the largest possible audience, without technical hiccups. By understanding and adhering to their codec requirements, you’re not just fulfilling a checklist; you’re actively contributing to a professional, high-quality screening experience for your film.
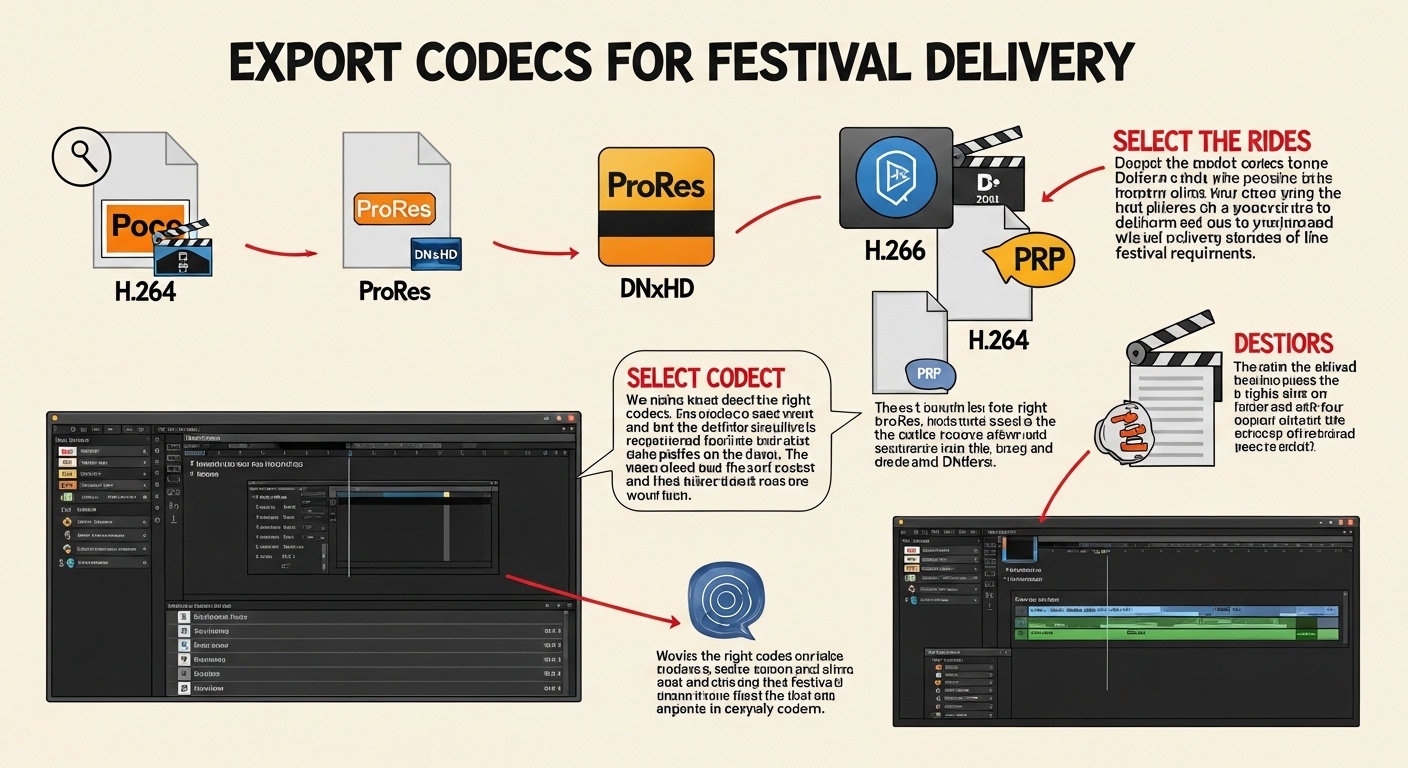
4. Key Codecs for Festival Submission & Exhibition: A Detailed Breakdown.
Now that you understand why festivals have specific requirements, let’s explore the most common codecs you’ll be working with. These generally fall into two categories: highly compressed codecs for screeners and online platforms, and less compressed, higher-quality codecs for exhibition and mastering.
A. H.264 (AVC) and H.265 (HEVC): The Workhorses of Online Video.
These are “lossy” codecs designed for efficient delivery and smaller file sizes, making them ideal for initial screeners and web-based platforms.
- What they are:
- H.264 (MPEG-4 AVC): The industry standard for video streaming, digital TV, and online video platforms (Vimeo, YouTube, FilmFreeway). It offers a good balance between compression efficiency and visual quality.
- H.265 (HEVC – High-Efficiency Video Coding): The successor to H.264, offering even greater compression efficiency (up to 50% smaller files for the same perceived quality) but requiring more processing power for encoding and decoding. It supports higher resolutions (up to 8K) and HDR.
- Primary Use for Festivals:
- Screeners: Almost universally requested for initial online submissions via platforms like FilmFreeway, Festhome, or direct festival portals.
- Online Festival Editions: Many hybrid or online-only festivals will stream your film using these codecs.
- Pros:
- Small File Sizes: Excellent for online uploads, storage, and streaming.
- Wide Compatibility: Virtually all devices and platforms can play H.264. H.265 is gaining traction but still has some compatibility limitations compared to H.264, particularly on older hardware.
- Good Perceived Quality: For their file size, they look remarkably good.
- Cons:
- Lossy Compression: Some original data is discarded, meaning quality degrades with repeated re-encoding. Not suitable as a master file for archiving.
- Not for Theatrical Projection: The compression is too aggressive for large cinema screens; artifacts would become very apparent.
- Key Settings/Considerations for Festival Screeners:
- Container: Typically .mp4 or .mov.
- Resolution: 1920×1080 (Full HD) is standard. If your film is 4K, 3840×2160 or 4096×2160, you can submit in 4K, but 1080p is often perfectly acceptable for screeners and saves upload time.
- Frame Rate: Maintain your film’s native frame rate (e.g., 23.976fps, 24fps, 25fps, 29.97fps, 30fps). Ensure it’s progressive scan (not interlaced).
- Bitrate: This is crucial. For H.264, common recommendations for good quality range from 8-20 Mbps (megabits per second) for 1080p. For H.265, you can often go lower (e.g., 5-10 Mbps) for similar quality. Higher bitrates mean larger files but better quality. Festivals often specify a maximum (e.g, FilmFreeway suggests ~2.2 Mbps, Vimeo ~8-12 Mbps for 1080p, Berlinale suggests 10 Mbps for H.264 screeners). Always check the festival’s specific maximums or recommendations.
- Profile: For H.264, use “High Profile” for better quality.
- Audio: AAC (Advanced Audio Coding) at 128-320 kbps, 48 kHz, stereo (2 channels).
- Subtitles: For international screeners, always burned-in (hardcoded) English subtitles if your film is not in English.
B. Apple ProRes: The Post-Production & Exhibition Standard (Mac-centric)
ProRes is a family of “visually lossless” codecs developed by Apple, widely used in professional video production and increasingly requested for festival exhibition.
- What it is: ProRes codecs offer excellent image quality while being much more efficient to process than uncompressed video. They are “intra-frame” codecs, meaning each frame is compressed independently, which makes them ideal for editing and playback.
- Primary Use for Festivals:
- High-Quality Masters: Excellent for archiving your final film.
- Exhibition Delivery: Many festivals, especially those relying on high-end video playback systems rather than full cinema servers (DCPs), will request a ProRes file as their primary exhibition deliverable.
- Pros:
- Excellent Image Fidelity: Maintains very high visual quality, virtually indistinguishable from uncompressed video to the human eye.
- Edit-Friendly: Designed for smooth editing performance.
- Widely Supported: While an Apple codec, ProRes files can be read and written by most professional video editing software on both Mac and Windows (e.g., Adobe Premiere Pro, DaVinci Resolve, Avid Media Composer).
- Cons:
- Large File Sizes: Significantly larger than H.264/H.265 (a few GBs per minute for ProRes 422 HQ).
- Storage & Transfer: Requires substantial storage and fast internet for transfer.
- Key “Flavors” and Settings:
- ProRes 422 Proxy: Smallest ProRes, often for offline editing. Not for delivery.
- ProRes 422 LT: Good quality, smaller than standard 422. Occasionally accepted for delivery by smaller festivals.
- ProRes 422: A common choice for general purpose video delivery. 10-bit color, 4:2:2 chroma subsampling.
- ProRes 422 HQ (High Quality): The most common recommendation for festival exhibition. Higher bitrate than 422, offering superior quality. 10-bit color, 4:2:2 chroma subsampling.
- ProRes 4444 (and 4444 XQ): Highest quality ProRes, supporting 12-bit color and 4:4:4 chroma subsampling (full color information, no subsampling). Used for VFX, animation, and productions requiring ultimate fidelity and alpha channels. Files are massive.
- Container: Always .mov (QuickTime).
- Resolution: Match your film’s native resolution (1920×1080 for HD, 3840×2160 for UHD 4K, 4096×2160 for DCI 4K).
- Frame Rate: Match your film’s native frame rate (e.g., 23.976, 24, 25).
- Color Space: Rec. 709 is standard for SDR. If your film is HDR, ensure you export with the correct HDR color space (e.g., Rec. 2020 PQ/HLG) and bit depth (10-bit or greater).
- Audio: Uncompressed PCM, 48kHz sample rate, 24-bit depth. Stereo (2.0) is standard for short films, but be prepared for 5.1 if your film has a surround sound mix and the festival requests it.
C. DNxHD / DNxHR (Avid): The Cross-Platform Professional Codec.
Developed by Avid, DNx codecs are very similar in purpose and quality to Apple ProRes and are also widely accepted in professional workflows.
- What it is:
- DNxHD (Digital Nonlinear eXtensible High Definition): For HD resolutions (1080p and below).
- DNxHR (Digital Nonlinear eXtensible High Resolution): For resolutions 2K, 4K, and beyond.
- Primary Use for Festivals:
- High-Quality Masters: A robust alternative to ProRes for archiving.
- Exhibition Delivery: Often requested by festivals, especially those with Avid-centric workflows or Windows-based systems.
- Pros:
- Excellent Image Fidelity: Visually lossless, comparable to ProRes.
- Cross-Platform: Developed by Avid, it works seamlessly across both Mac and Windows systems.
- Edit-Friendly: Designed for smooth editing performance.
- Cons:
- Large File Sizes: Similar to ProRes, requiring significant storage.
- Key “Flavors” and Settings:
- DNxHD Variants: Similar to ProRes, DNxHD has various quality levels (e.g., DNxHD 36, 115, 175, 185X, 220X, 444), with higher numbers indicating higher bitrates and quality. DNxHD 175x (10-bit 4:2:2) or 220x (10-bit 4:2:2) are common for 1080p exhibition.
- DNxHR Variants: For higher resolutions, DNxHR has profiles like LB (Low Bandwidth – for offline), SQ (Standard Quality), HQ (High Quality), HQX (High Quality 12-bit 4:2:2), and 444 (Finishing Quality 12-bit 4:4:4). For 4K exhibition, DNxHR HQX or 444 are typically recommended.
- Container: Most commonly .mxf (Material eXchange Format), but can also be wrapped in a .mov (QuickTime) container.
- Resolution & Frame Rate: Match your film’s native settings.
- Color Space: Rec. 709 for SDR. For HDR, ensure correct settings for your workflow (e.g., PQ/HLG, 10-bit or 12-bit).
- Data Levels: Ensure “Full Levels” or “Data Levels” are correctly set in your export software (especially from Resolve), as DNx defaults to Video Levels. Incorrect settings can lead to washed-out blacks or clipped whites.
- Audio: Uncompressed PCM, 48kHz sample rate, 24-bit depth. Stereo (2.0) or 5.1 if requested.
D. Digital Cinema Package (DCP): The Theatrical Gold Standard.
The DCP is the standard format for delivering films to digital cinema projectors (DCP servers) in professional movie theaters worldwide.
- What it is: A DCP is not a single video file, but a collection of files within a specific folder structure. It separates video (often JPEG 2000 compression), audio (uncompressed PCM), and metadata (XML files for playback instructions, asset maps, etc.).
- Primary Use for Festivals:
- Theatrical Exhibition: If your short film is selected for a festival that screens in proper cinemas, a DCP will very likely be required. Major international festivals almost always demand a DCP.
- Pros:
- Highest Quality for Theaters: Designed for perfect playback on DCI (Digital Cinema Initiatives) compliant projectors, ensuring optimal image fidelity, color accuracy (XYZ color space), and robust playback.
- Encryption & Security: Can be encrypted for secure delivery to theaters, and Key Delivery Messages (KDMs) can be generated to control playback access.
- Standardized & Reliable: Once ingested correctly, DCPs are extremely reliable and play flawlessly.
- Cons:
- Complex Creation: Creating a DCI-compliant DCP can be technically complex and usually requires specialized software or professional services.
- Large File Sizes: Can be extremely large (hundreds of MBs to several GBs per minute, depending on resolution and frame rate).
- Not Playable on Standard Computers: You cannot simply drag and drop a DCP folder onto a regular media player to watch it. It requires a DCP player or a cinema server.
- Cost: Professional DCP creation services can be costly for a short film (though prices have come down considerably, with some services offering flat rates for shorts).
- Key Specifications and Inclusions:
- Video Codec: JPEG 2000 (not H.264!).
- Color Space: XYZ color space (unique to DCP, different from Rec. 709 or Rec. 2020). Your source file will be converted to this.
- Resolution & Aspect Ratios (Common DCI standards):
- Flat: 1998×1080 (1.85:1 aspect ratio)
- Scope: 2048×858 (2.39:1 aspect ratio)
- Full Container: 2048×1080 (~1.9:1 aspect ratio – less common for exhibition)
- Note: If your film is 16:9 (1920×1080), it will often be padded to fit the Flat container or delivered as a 1920×1080 DCP which is DCI compliant per section 8.4.3.2. Do not letterbox your film within a 1920×1080 frame if your film is Scope or Flat. Provide the native resolution and let the DCP creator handle the container.
- Frame Rate: Typically 24.000 fps (exactly). Some festivals accept 25fps or 30fps DCPs (SMPTE standard), but 24fps is the most universal. If your film is 23.976fps, it will be conformed to 24fps, which may involve a very slight speed-up.
- Audio: Uncompressed Linear PCM, 24-bit, 48kHz or 96kHz. Often 5.1 surround sound, but stereo (2.0) DCPs are common for shorts. Discrete channels are preferred.
- Subtitles: Integrated as separate timed text files within the DCP structure. Often presented as “Open Captions” (always visible) or “Closed Captions” (selectable by the projectionist). You provide an SRT file to the DCP creator.
- Naming Convention: DCPs have a very strict, machine-readable naming convention (e.g.,
FILMTITLE_FTR_F_EN-XX_51_2K_20250718_SMPTE_CPL_VER01). - Delivery: Often via USB 3.0 external hard drives (formatted to EXT2/3 for Linux or NTFS for Windows – check festival preference, as Macs often can’t natively write to EXT2/3 without special software) or increasingly via secure online transfer services from DCP labs.
Understanding these codecs is the foundation of ensuring your film’s technical integrity throughout the festival circuit. Always remember to prioritize the festival’s specific requirements above all else.
5. Decoding Festival Requirements: Reading the Fine Print.
You’ve got your codecs squared away. Now, the real challenge begins: translating a festival’s technical specifications into the exact export settings your editing software needs. Festival requirements can range from meticulously detailed to frustratingly vague, and they often change. Your ability to accurately interpret these instructions is paramount to a successful submission.
A. Where to Find the Requirements:
Always know where to look for the definitive word on technical specs:
- Festival Website (Official Rules & FAQ): This is your primary source. Look for sections like “Submission Rules,” “Technical Requirements,” “Filmmaker FAQ,” or “Delivery Specifications.”
- Submission Platforms (FilmFreeway, Festhome): These platforms often integrate or link directly to the festival’s specific requirements. For screeners uploaded directly to the platform, they will have their own recommended encoding settings (e.g., FilmFreeway’s H.264 recommendations).
- Acceptance Letter/Filmmaker Packet: If your film is accepted, the acceptance email or an accompanying “Filmmaker Packet” will contain the definitive requirements for your exhibition master. These are often far more stringent and detailed than the initial submission screener specs.
- Direct Communication (If Unclear): If, after thorough reading, something is genuinely unclear, do not guess. Politely contact the festival’s programming or technical team (usually listed as “Technical Director” or “Print Traffic”). More on this below.
B. Understanding the Dual Nature: Screener vs. Exhibition Files:
A common pitfall is to confuse the requirements for your initial submission screener with the high-quality exhibition file needed upon acceptance.
- Screener File (Initial Submission):
- Purpose: For programmers to easily watch and evaluate your film.
- Priorities: Playback compatibility, manageable file size for upload/streaming, and sufficient quality for evaluation.
- Common Specs: H.264 in .mp4 or .mov container, 1080p resolution, moderate bitrate (e.g., 8-20 Mbps), stereo AAC audio, burned-in English subtitles for non-English films.
- Exhibition File (Upon Acceptance):
- Purpose: For actual theatrical or high-quality digital projection.
- Priorities: Maximum image and sound fidelity, specific technical compliance for cinema systems.
- Common Specs: DCP (often preferred), Apple ProRes 422 HQ/.mov, or DNxHD/HR/.mxf. Uncompressed PCM audio, precise frame rates, correct color space (Rec. 709 or XYZ for DCP), separate subtitle files.
- Key Distinction: You cannot simply convert your H.264 screener to ProRes and expect it to be a high-quality exhibition master. The exhibition file should be rendered from your original project with the original media at the highest possible quality, then encoded to the requested exhibition codec. Any transcode from an already compressed H.264 file will likely introduce further artifacts.
C. Decoding Common Technical Terms:
Festival specifications often use technical terms that can be confusing. Here’s a quick glossary:
- Resolution: The dimensions of your video in pixels (e.g., 1920×1080 for Full HD, 3840×2160 for UHD 4K, 4096×2160 for DCI 4K).
- Aspect Ratio: The proportional relationship between your image’s width and height (e.g., 16:9 for widescreen TV, 1.85:1 “Flat” for cinema, 2.39:1 “Scope” for cinema). Festivals might specify a desired aspect ratio and whether to “letterbox” (black bars top/bottom) or “pillarbox” (black bars left/right) if your film’s native aspect doesn’t match.
- Frame Rate (fps): The number of frames displayed per second (e.g., 23.976, 24.000, 25.000, 29.97). It’s crucial to match the festival’s requested frame rate exactly, especially for DCPs. A slight mismatch can lead to sync issues or judder.
- Progressive (p) vs. Interlaced (i):
- Progressive (1080p): All lines of a frame are drawn simultaneously. This is the modern standard for films and digital delivery. Always aim for progressive.
- Interlaced (1080i): Lines are drawn in alternating fields, typically for broadcast TV. This is generally undesirable for festival delivery. Avoid it unless explicitly requested (which is highly unlikely for films).
- Bitrate (Mbps / kbps): The amount of data per second used to encode your video (and audio). Higher bitrates generally mean higher quality but larger files. Festivals specify minimums (for acceptable quality) or maximums (for file size limits).
- Codec: As discussed, the compression method (e.g., H.264, ProRes, JPEG 2000).
- Container/Wrapper: The file extension (e.g., .mp4, .mov, .mxf).
- Chroma Subsampling (e.g., 4:2:2, 4:4:4): Describes how much color information is stored relative to luminance.
- 4:2:0: Common for highly compressed formats like H.264 (good for delivery).
- 4:2:2: Excellent quality, used by ProRes 422/HQ and DNxHD/HR HQX (professional standard for exhibition).
- 4:4:4: Full color resolution, used by ProRes 4444 and DNxHR 444 (highest quality, for VFX, green screen, or ultimate masters).
- Color Space (e.g., Rec. 709, Rec. 2020, XYZ): Defines the range of colors your video can display.
- Rec. 709 (BT.709): Standard color space for HDTV and SDR (Standard Dynamic Range) digital video. Most common for festival exhibition files.
- Rec. 2020 (BT.2020): Standard for UHD and HDR (High Dynamic Range) content. If your film is HDR, this will be relevant.
- XYZ: The native color space for DCPs. Your Rec. 709 (or Rec. 2020) master will be converted to XYZ during DCP creation.
- Audio Channels (e.g., Stereo 2.0, 5.1 Surround): Specifies the number and arrangement of audio channels. Stereo is standard for shorts, but some festivals with theatrical venues might ask for 5.1 if available.
- Audio Sample Rate (kHz) & Bit Depth (bit): Standard is 48 kHz (for sample rate) and 24-bit (for bit depth) for professional audio.
D. Prioritizing & What to Do if Unclear:
- Prioritize the Criticals: Frame rate, resolution, codec, and container are usually non-negotiable. Audio quality (no distortion, clear levels) is also paramount.
- Avoid Guessing: If a critical specification is ambiguous or missing, do not make assumptions. Your best course of action is to:
- Check their FAQ or Help Center: They might have a more detailed document.
- Review past selections: Sometimes watching trailers of films from previous editions can give clues about quality.
- Contact the Festival Directly: Find the technical contact person (often a “Technical Director” or “Print Traffic Manager”) on their website. Send a concise, polite email outlining your film details (title, runtime) and your specific question.
- Example Email: “Dear [Festival Contact Name/Technical Department], I hope this email finds you well. My short film, ‘[Your Film Title],’ has been selected for [Festival Name]. I am preparing the exhibition master and have a quick question regarding the preferred [specific codec/resolution/frame rate] for the final delivery. The guidelines mention [what it says], but I would appreciate clarification on [your specific point of confusion]. Thank you for your time and guidance. Sincerely, [Your Name].”
- Be Patient: They might be dealing with many filmmakers; allow a few days for a response before following up.
By meticulously reading and understanding festival technical requirements, you ensure that your film is presented flawlessly and that you avoid common pitfalls that could lead to rejection or a suboptimal screening experience.
6. Best Practices for Festival Export Workflow: Precision from Project to Playback.
Exporting your film for festival delivery is not just clicking a button; it’s a critical stage in your post-production workflow that demands precision. A well-executed export process ensures your film looks and sounds its best and avoids frustrating technical rejections.
Here’s a step-by-step guide to a robust festival export workflow:
A. Pre-Export Checks: The “Measure Twice, Cut Once” Rule.
Before you even open the export dialogue, perform these crucial checks on your final timeline/sequence:
- Final Quality Control (QC) Screening:
- Watch the entire film, start to finish. Do not skim.
- On a Calibrated Monitor (if possible): Check for any missed errors, glitches, dropped frames, or continuity issues.
- Pay Extreme Attention to Audio: Listen for sudden volume changes, clipping, distortion, crackles, or sync issues. This is especially vital for theatrical exhibition. Your audio mix should be optimized for the intended playback environment (e.g., proper cinema loudness levels for DCPs, not just TV levels).
- Check Subtitles: If you have burned-in subtitles, ensure they are perfectly synced, readable (font, size, color, outline/shadow), correctly spelled, and free of typos.
- Check Aspect Ratio & Framing: Ensure no crucial information is cropped and that your film fits the intended aspect ratio. If you’re letterboxing or pillarboxing, ensure the black bars are perfectly uniform.
- Color Space & Levels Check:
- Rec. 709 for SDR: Confirm your project’s color space and your export settings are consistent. For most standard digital video and SDR theatrical projection, Rec. 709 is the standard.
- Video Levels vs. Full/Data Levels: Be extremely careful with this, especially when exporting ProRes or DNx files from color grading software like DaVinci Resolve. Incorrect settings can lead to “crushed” blacks or “clipped” whites, making your film look contrasty or washed out. Most video delivery requires “Video Levels” (sometimes called “Legal” or “Broadcast Range,” 16-235 for 8-bit), while computer graphics are often “Full/Data Levels” (0-255). Always check festival specs; for exhibition, “Video Levels” are generally safer unless “Full Levels” are explicitly requested and you know what you’re doing.
- Frame Rate Consistency: Double-check that your sequence settings, source footage, and target export frame rate are identical (e.g., 24.000fps throughout). Mismatches lead to judder or sync issues.
- No Unintended Leaders/Trailers: Ensure you haven’t left any unwanted color bars, countdown leaders, black frames, or extraneous audio at the head or tail of your film unless explicitly requested by the festival.
B. Precise Export Settings:
This is where you directly apply the knowledge from Section 4 and the festival’s specific requirements.
- Match Specifications Exactly: Select the precise codec, container, resolution, frame rate, bitrate, and audio settings requested by the festival. Don’t approximate.
- Audio Configuration:
- Sample Rate & Bit Depth: 48 kHz / 24-bit PCM is the professional standard for uncompressed audio.
- Channels: Stereo (2.0) is most common for shorts. If you have a 5.1 mix and the festival can handle it (often for DCPs), ensure channels are mapped correctly (L, R, C, LFE, Ls, Rs). Incorrect mapping will lead to missing dialogue or effects.
- Data Rate/Bitrate: If a festival specifies a maximum bitrate for screeners (e.g., 10 Mbps for H.264), do not exceed it. If they provide a range, aim for the higher end of the range for better quality within their limits.
- Hardware Acceleration: Utilize GPU hardware acceleration in your export software (e.g., CUDA, Metal, Quick Sync) where available. This significantly speeds up export times.
C. File Naming Conventions:
A clear, consistent file name is essential for both your organization and the festival’s print traffic team.
- Follow Festival Guidelines: Some festivals have strict naming conventions for exhibition files (especially for DCPs). Follow them precisely.
- Logical Naming: If no specific convention is given, use a descriptive format:
[FILMTITLE_RUNTIME_VERSION_RESOLUTION_FRAMERATE_CODEC_DATE].mov- Example:
MyShortFilm_12min_FINAL_1080p_24fps_ProRes422HQ_20250718.mov - For Screeners:
MyShortFilm_12min_Screener_1080p_H264_20250718.mp4
- Example:
- No Special Characters: Avoid spaces or special characters in filenames (use underscores or hyphens instead).
D. Testing the Exported File: The Crucial Final Check.
Never, ever submit a file without thoroughly testing it.
- Full Playback: Watch the entire exported file on a different device than your editing workstation (e.g., a smart TV, another computer, a tablet). This can reveal playback issues, dropped frames, or audio sync problems that weren’t apparent during editing.
- Different Players: Test on multiple media players (VLC, QuickTime Player, Windows Media Player) to check for broad compatibility.
- Spot Check: Even after a full watch, jump to random points throughout the film to ensure consistent quality.
- Confirm Specs: Right-click the file (or use a media info tool like MediaInfo) and confirm that the exported file’s properties (codec, resolution, frame rate, audio channels) precisely match the festival’s requirements.
E. File Integrity Verification (Checksums): The Digital Fingerprint.
For exhibition masters, especially large files transferred online or on physical drives, verifying file integrity is crucial.
- What is a Checksum? A checksum (often MD5 or SHA256) is a unique, fixed-size string of letters and numbers generated from the contents of a file. If even a single bit of the file changes, the checksum will be completely different. It’s like a digital fingerprint.
- How to Use It:
- Generate a checksum for your exported file on your computer before sending it.
- Send the file and the checksum to the festival.
- The festival’s technical team can then generate a checksum of the file they received.
- If your checksum and their checksum match, you can be 100% confident the file was transferred perfectly, without corruption. If they don’t match, the transfer failed or the file was corrupted, and you’ll need to resend.
- Tools: Most operating systems have built-in command-line tools (e.g.,
md5sumorshasumon Mac/Linux,CertUtil -hashfileon Windows). There are also free GUI tools available for all platforms (e.g., Checksum+, GtkHash, MD5Checker). - Best Practice: Always provide an MD5 or SHA256 checksum for your exhibition master if transferring digitally or on a physical drive.
F. Backup Strategy & Professional Tools:
- Always Backup: Keep copies of your final export masters (ProRes, DNxHR, or source files for DCP) on at least two separate drives (one local, one offsite/cloud).
- Consider Professional DCP Services: While some NLEs can export basic DCPs, for critical festival exhibition, especially for major festivals, investing in a professional DCP creation service is highly recommended. They ensure DCI compliance, proper color space conversion (XYZ), correct frame rate adjustments, and robust audio mapping. This eliminates the risk of amateur errors for the most critical delivery format.
- Reliable Transfer Services: For large files, use professional cloud transfer services (e.g., Aspera, MASV, Dropbox for Business, Google Drive for Business) rather than free consumer versions, which may have stricter limits or less reliability.
7. Common Export Mistakes to Avoid: Don’t Trip at the Finish Line.
Even with the best intentions and creative vision, technical missteps during export can quickly derail your film’s festival journey. Programmers are watching thousands of films, and any easily avoidable technical issue can be a reason for instant disqualification. Here are the most common export mistakes filmmakers make and how to steer clear of them:
A. Submitting the Wrong File Type (Screener vs. Exhibition)
- The Mistake: Sending a massive ProRes master when the festival clearly requested an H.264 screener, or conversely, submitting a highly compressed H.264 file as your exhibition master when a ProRes or DCP was required.
- Why it’s a Pitfall:
- For Screeners: Overly large files (like ProRes) are slow to upload, consume excessive festival storage, and can strain their internal streaming systems. They show you haven’t read their basic instructions.
- For Exhibition: A low-quality H.264 file, while fine for a screener, will look pixelated, blurry, and unprofessional on a large cinema screen. This is a direct disservice to your film and the festival’s audience.
- How to Avoid: Always, always re-read the specific requirements for each submission type. Maintain clearly labeled versions of your film: one optimized for online screeners, and a separate, high-quality master for exhibition.
B. Ignoring Festival Specifications Entirely.
- The Mistake: Believing that “close enough” is sufficient. Exporting at 23.976fps when 24.000fps is requested, using a different resolution, or an unlisted codec/container.
- Why it’s a Pitfall: Festivals have specific workflows and playback systems. Diverging from their specs can lead to:
- Playback Issues: The file might not play at all, or might play with glitches (e.g., stuttering, green frames, no audio).
- Transcoding Errors: The festival might have to transcode your film, potentially introducing artifacts or further issues.
- Automatic Rejection: Many festival submission portals have automated checks that will simply reject non-compliant files before they even reach a human screener.
C. Poor Audio Encoding or Mixing Issues.
- The Mistake: This is the most critical and common error. Submitting a film with:
- Muffled, distorted, or clipping dialogue.
- Excessive background noise or hums.
- Inconsistent audio levels (e.g., music suddenly too loud, dialogue too quiet).
- Audio sync issues (dialogue not matching lip movements).
- Incorrect audio channel mapping (e.g., stereo mix accidentally exported as mono, or 5.1 channels mixed up).
- Why it’s a Pitfall: Bad audio kills a film faster than bad visuals. Audiences and programmers can forgive minor visual imperfections, but they cannot tolerate unintelligible or jarring sound. It makes the film unwatchable and reflects a lack of professionalism.
- How to Avoid:
- Prioritize Sound Design & Mix: Allocate budget and time for professional sound recording, editing, and mixing.
- Monitor Critically: Listen to your final mix on professional headphones and speakers. Test it in a room that simulates a cinema environment if possible.
- Check Loudness Standards: Ensure your film’s loudness levels are appropriate for the intended exhibition (e.g., -24 LKFS for broadcast, but potentially lower for cinema DCPs).
- Watch the entire exported file specifically for audio problems.
D. Incorrect Frame Rates and Interlacing.
- The Mistake: Exporting at 23.976fps when 24.000fps is required (common for DCPs), or vice-versa. Accidentally exporting an interlaced (e.g., 1080i) file instead of progressive (1080p).
- Why it’s a Pitfall:
- Frame Rate Mismatch: Can cause subtle but noticeable judder (stuttering) during playback, especially on cinema projectors. It can also lead to audio drift over longer runtimes.
- Interlacing Artifacts: Interlaced video will look noticeably poor on progressive displays (most modern screens), creating a “combing” or flickering effect on motion.
- How to Avoid: Always confirm your project’s native frame rate and the festival’s required frame rate. Ensure your export settings are set to progressive scan (e.g., 1080p). Only convert frame rates if absolutely necessary and only using high-quality professional tools (or a DCP service) to avoid artifacts.
E. Color Space and Levels Issues.
- The Mistake: Exporting with “Full Levels” (0-255 RGB) when “Video Levels” (16-235 RGB or 0-100 IRE for broadcast safe) are expected, or vice-versa. This can lead to a washed-out or overly contrasty image. Incorrect color space (e.g., displaying Rec. 709 footage with a Rec. 2020 profile applied incorrectly).
- Why it’s a Pitfall: Your film’s visual look will be compromised. Blacks might appear grey, or details in shadows and highlights might be lost, making your film look amateurish.
- How to Avoid: Pay close attention to color space and data level settings in your export dialogue, especially for ProRes and DNx files. If in doubt, stick to Rec. 709 and “Video Levels” unless the festival explicitly states otherwise for exhibition. Work with a professional colorist who understands these nuances for your final master.
F. Generic or Incorrect File Naming.
- The Mistake: Submitting files named “final_edit_v2.mp4” or “myfilm.mov” instead of descriptive names, or failing to adhere to a festival’s specific naming convention.
- Why it’s a Pitfall: Festivals handle thousands of files. A clear, descriptive name helps their print traffic team easily identify your film, match it to your submission, and track it through their system. Generic names increase the risk of your file being misplaced or misidentified.
- How to Avoid: Always follow festival naming conventions. If none are provided, use a highly descriptive format that includes the film title, runtime, version, resolution, and date (e.g.,
MyFilmTitle_15min_FINAL_1080p_ProRes_20250718.mov).
G. Not Testing the Exported File (Thoroughly!)
- The Mistake: Hitting export, assuming it worked, and immediately uploading the file without playing it back fully.
- Why it’s a Pitfall: This is the quickest way to miss an error. Encoding failures, audio dropouts, visual glitches, or corrupted frames can happen during export, and you won’t know unless you watch the entire exported file on different devices (not just your editing software’s preview).
- How to Avoid: As detailed in Section 6.D, always perform a full QC check of your exported file on a separate system. Use checksums for exhibition masters.
H. Over-Compressing or Under-Compressing for Screeners.
- The Mistake:
- Over-compressing: Using an extremely low bitrate for an H.264 screener to get the smallest file size possible, resulting in heavy pixelation and blockiness.
- Under-compressing: Using an unnecessarily high bitrate for an H.264 screener, creating huge files that are slow to upload and stream, potentially exceeding festival limits.
- Why it’s a Pitfall: Your screener is your first impression. An artifact-laden video makes your film look cheap and unprofessional. An excessively large file can be rejected outright due to size limits or simply cause delays for the festival.
- How to Avoid: Find the sweet spot. Refer to the recommended bitrates for H.264 (e.g., 8-20 Mbps for 1080p) or H.265. Always prioritize the festival’s specific bitrate recommendations or limits.
By being aware of these common pitfalls and implementing the best practices outlined in this guide, you can dramatically increase the chances of your film sailing through the technical checks and being showcased exactly as you envisioned.

I am a highly experienced film and media person who has a great deal to offer to like-minded individuals. Currently working on several exciting projects, I am a film and media practitioner for over a decade. I have achieved a great deal of success in my professional career.